How to make your own DIY upcycled pallet sectional
October 15, 2015
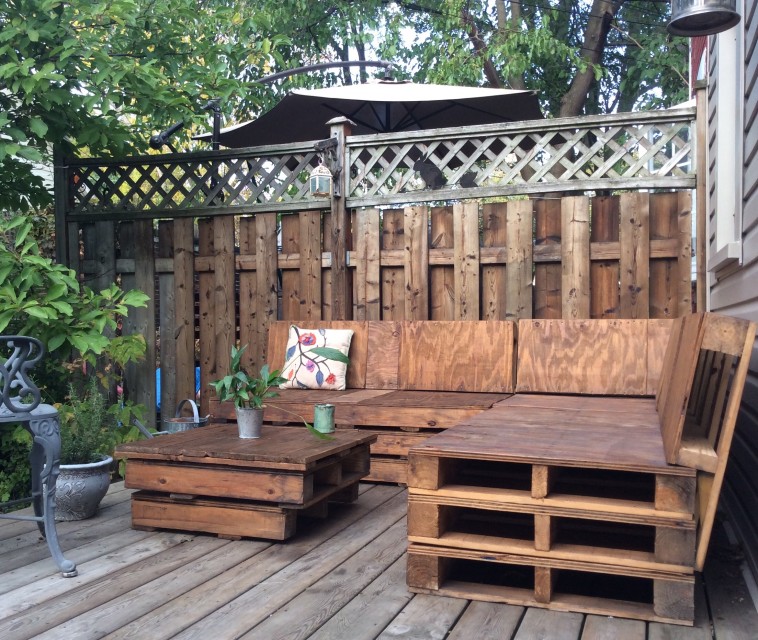
It may no longer be patio season in these here parts but on a warm sunny Canadian Thanksgiving weekend, but I did get off my ass and finally stain and seal the sectional my man and I built back when it was still summer. Now that it’s complete, I figured I’d share a little ‘don’t worry, summer will be back’ inspiration for those of you craving a backyard couch without the fat wallet and virgin plastics involved in most store bought varieties.
No skills required, though it helps to know how to use some sort of power saw
So how do you build one of these puppies? Let me preface this by saying my household is not inhabited by anyone remotely seasoned or particularly skilled with power tools. There is no Mike Holmes under our roof. But we pulled it off! Mostly, I did the measuring. And since my past attempts at measuring, cutting and sewing fabric for large square floor pillows lead to laughably wonky results, I made sure to measure again and again to ensure that I got it right before we fired up the power saw. And I still somehow got it wrong a couple times (don’t ask) so lesson is: buy an extra pallet in case you screw up.
Tracking down used skids
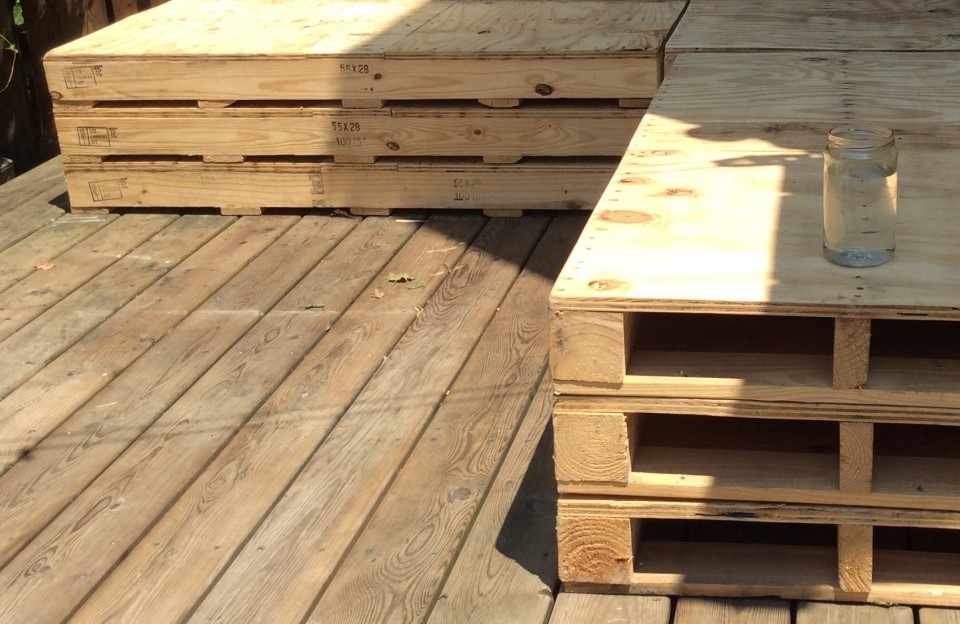
You don’t need to chop down trees to make your furniture. You just need a stash of second hand shipping pallets aka skids. They should be easy enough to find in your town. A quick google search for “recycled pallets” turned up a company in Toronto called Just Skids (near the Etobicoke Ikea). They sell, well, just skids, thousands of them, all second hand and all different shapes and sizes. And custom ones too made of recycled wood. The owner, Joe, also sells a whack of really cool antique crates. In fact, I’ve made bookshelves and a TV stand with vintage crates I got from here (I’ll post those projects on here soon). I even scored a funky vintage turquoise ladder there, too (still got to put that to creative use). But I digress. This time around we went out to Joe’s warehouse with a rental van big enough to haul home 10-12 large pallets. The average skid is 40 x 48 inches. Those will work. You can stack as many as will fit in your space, cut them in half, use them whole, whatever will work in your yard. But we stumbled on some that were 55 x 29 and we had room for them on our deck so went with those.
Tip for choosing the right skids: Make sure your skids are made of solid slatted wood, not plywood wood. We went in there looking for solid wood shipping pallets with the usual slatted tops but got so dazzled by how the 55 x 29″ size would fit our deck perfectly, we forgot the main reason why solid wood is so important: plywood will crack and warp more easily over time and isn’t great for outdoor use long term (we’ll be tarping it in the winter). And two, plywood-topped pallets don’t drain water the way slatted pallets will. Plus plywood may be bound with formaldehyde-offgassing glues, which admittedly is less of a concern in the great outdoors where fresh air is, well, everywhere, but still…Lesson learned.
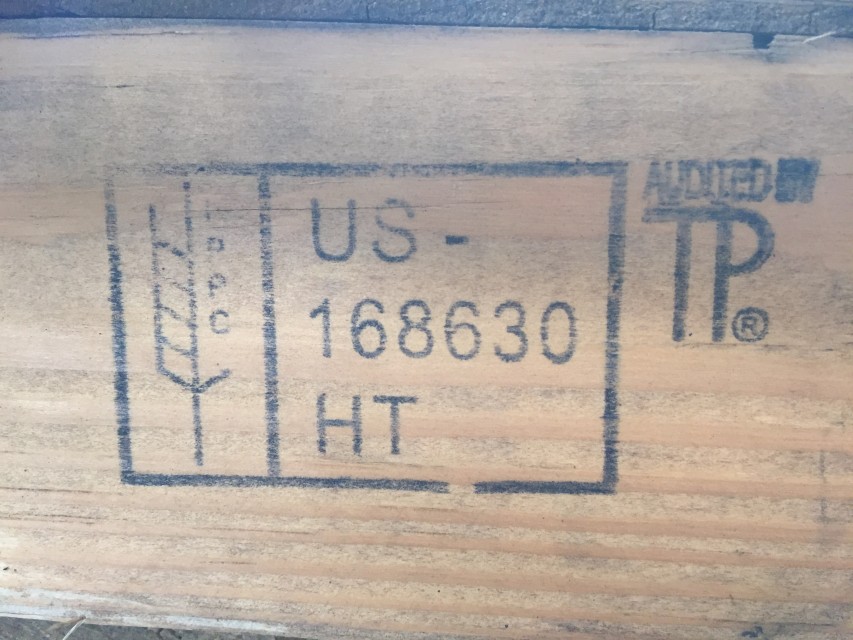
Make sure it’s not fumigated with methyl bromide! Methyl bromide is an ozone depleting chem that’s mostly been banned but is still used on some American pallets. So avoid anything stamped with an MB. Look for something that’s been heat-treated instead, with an HT in the stamp. Canadian pallets are never MB treated.
Your basic design
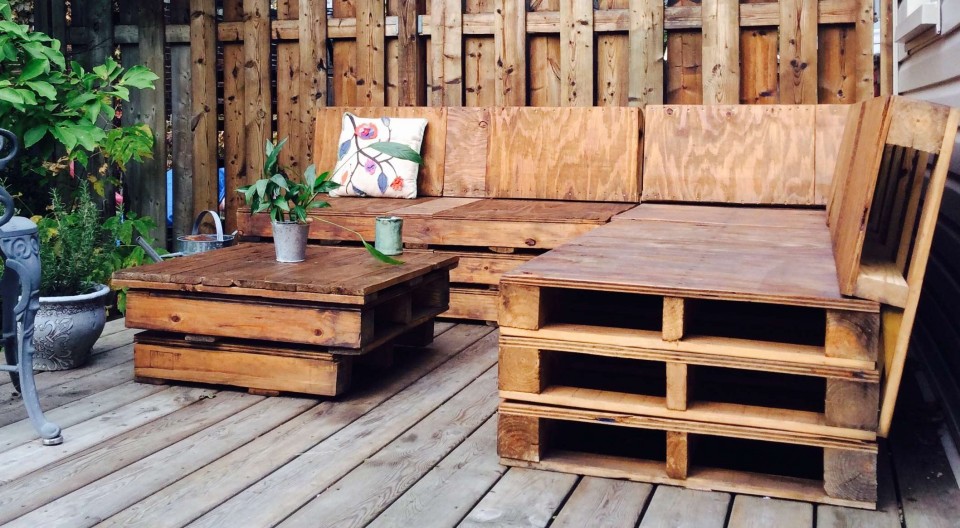
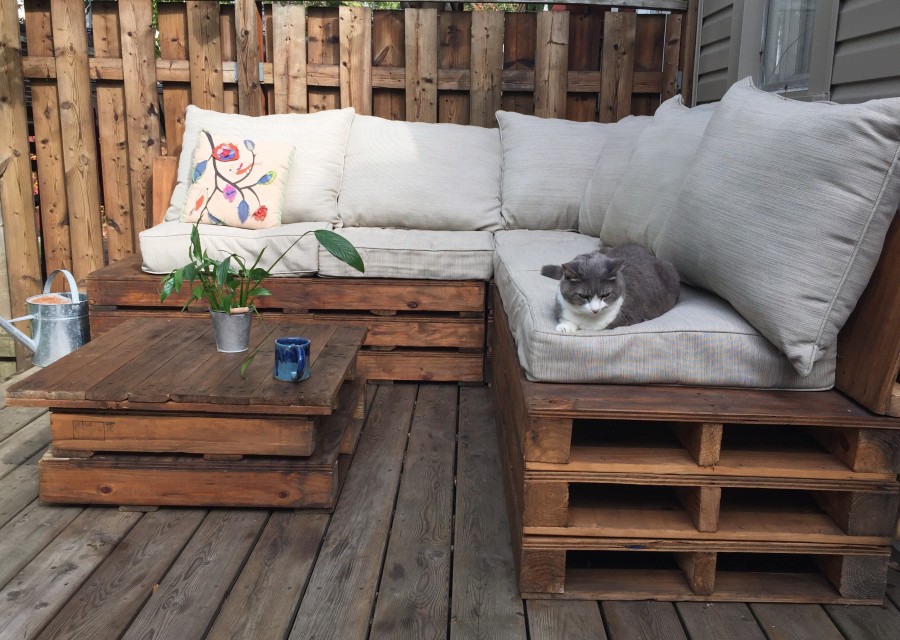
The easiest pattern basically involves making a compact L shape couch with two stacks of skids, three pallets high. You can throw some cushions on there wedged up against a wall and your done. We decided to a make full size sectional using two perpendicular piles, three deep (secured with screws), leaving a gap between them. Then we filled in the gap between them by cutting another couple skids in half, more or less. Make sure you measure it so it matches the depth of your pallets.
(Excuse the jar of water in the shot, it was hot out and we were thirsty).
Then we built the backs. We wanted them slanted so we’d have a good lean, which seemed ambitious to me but here’s how he did it.
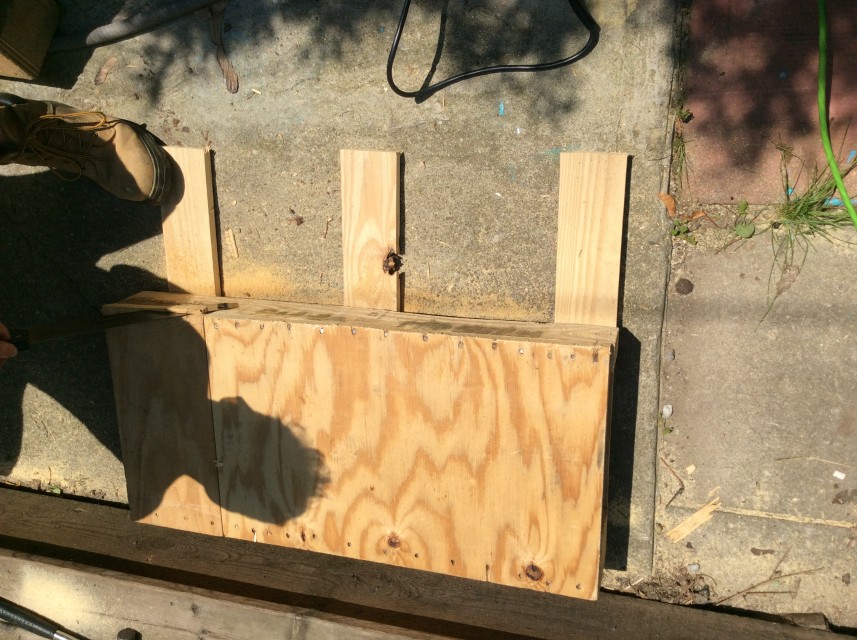
Essentially he cut the pallets down to the height we wanted for backs, but didn’t saw all the way through, leaving the back slats attached as support beams and drilled them into the base. 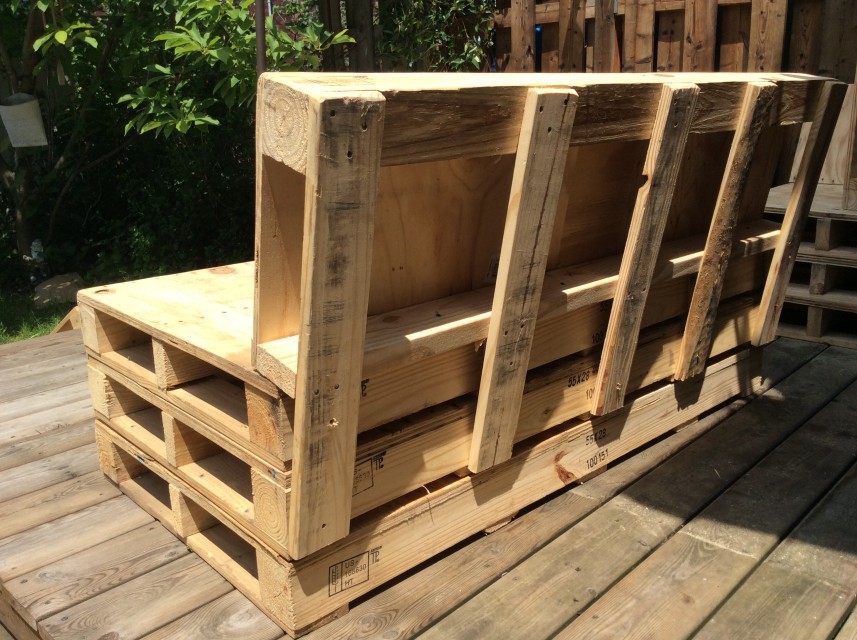
Once it was all done, we sanded all the rough edges down, cracked a beer and called it a day.
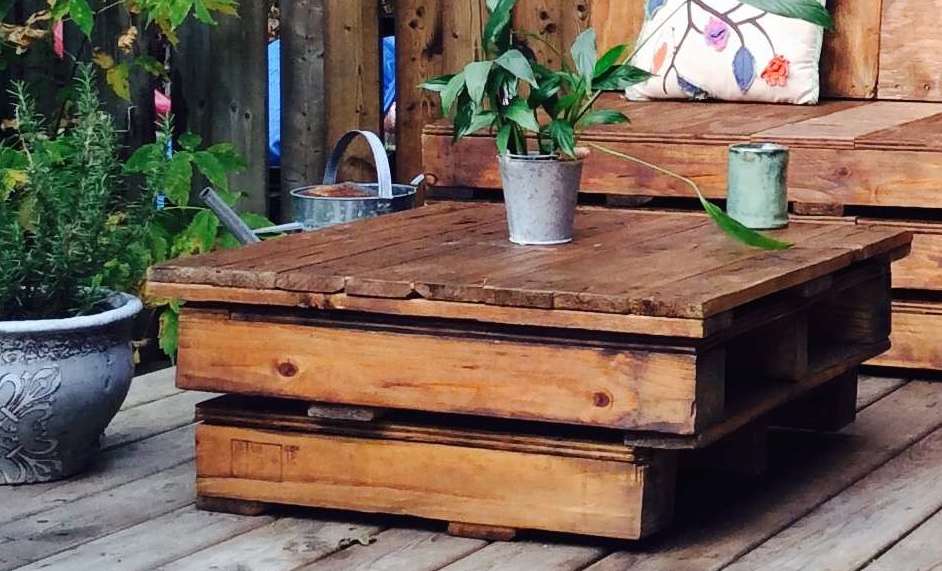
Leftover skid table
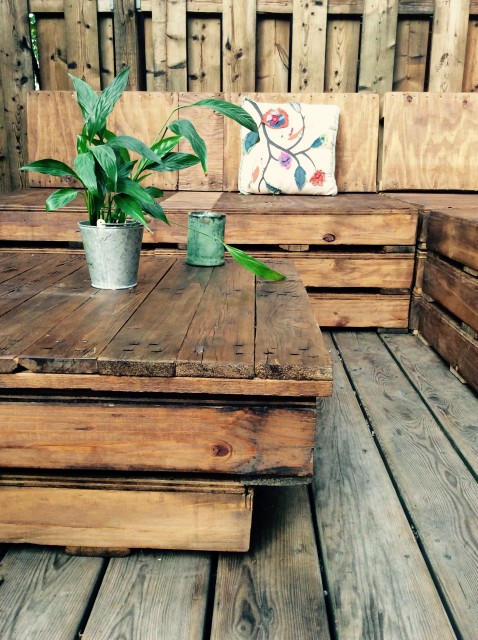
With the leftover pallet pieces we made a super basic table by stacking a few, then we threw on a random wooden lid we found at the Joe’s. But that’s really not necessary.
Eco friendly waterproofing
Fast forward to two months later. I needed to get some sealant on here in a hurry to make sure all our blood, sweat and swear words lasted for more than one season. I considered hemp oil, but honestly, I applied a bunch of coats of hemp oil to outdoor wooden furniture in the past and it wasn’t the greatest. You need to keep reapplying every year and I wanted something tougher, longer lasting that created more of a seal, but was, of course, still eco-friendly. I ended up getting a gallon of Seal Once from Eco-building.ca (best to order it online). This stuff is polymer-based, so it’s not natural like hemp oil but it is water-based, nontoxic, low or no VOCs (depending on the type), nonflammable, odour-free, non-leaching and it’ll last up to 10 years. You can even Seal Once products on boats and marine surfaces and they won’t leach out and harm aquatic life. Plus it’s tintable. I chose basic “brown” and kept stirring in tint until I got the shade I wanted. The result? I think it looks pretty darn good, if you ask me. Very natural, no shiny plasticy finish.
What about cushions?
Searching out cushions is a whole other job. I, sadly, couldn’t find any large square outdoor seat cushions made with 100% recycled materials in Canada. Any of the ones I found with recycled content were throw cushions. You can make your own with some recycled coffee bean sacks but that’s pretty scratchy. I also looked into making my own with outdoor fabric made of old pop bottles and called a several American manufacturers but couldn’t find anyone selling the fabric by the yard in Toronto. I also priced out locally made flame retardant-free partly soy foam as well as natural latex but combined with outdoor fabric my cushions were going to cost us well over $500. I needed enough stuffing to fill out basically 5 square 25×25 inch cushions that would be a couple inches high – that’s a shit load of filling. You could order several pound of natural kapok fluff from Amazon (used to fill some throw cushions), but it needs to be fairly dense for a seat cushion so you need bags and bags full. Plus as I mentioned earlier, I did a terrible botch job trying to sew some large square floor cushion covers for a friend a few years ago so, with a heavy heart, I took a step back from the DIY cushion route. It was early July and we had a sectional built but no pillows to make it comfy and we were getting antsy. I found some Allen + Roth cushions on sale at Lowe’s made by Brentwood Originals that fit our dimensions perfectly. I did some digging and it turns out that these mostly American made cushions are stuffed, as with all Brentwood Originals pillows, close to 100% recycled polyester (yay!). Oddly, they don’t list this on the Lowe’s website but this is Brentwood’s company wide policy and these guys make Allen + Roth branded products for Lowe’s. More digging confirmed that their outdoor cushions do not contain any chemical flame retardants (yay again!). Actually, turns out that all outdoor cushions are excluded from flame retardant mandates, but you should always double check cushions marketed as both “indoor/outdoor.” These ones are strictly outdoor. I’m still itching for totally natural cushions but for now, these do the trick. The cat’s definitely enjoying them. And after a long day of writing, it’s a super comfy place to lie back, put our feet up, look up at the trees and clouds above and sip on a glass of wine, or at this time of a year, a hot toddy.
About the Author

Adria Vasil is one of Canada’s leading environmental journalists and the bestselling author of the Ecoholic book series.